Calendar Views
Calendar views allow you to look at your record events on a calendar. The records should have at least one Date / DateTime field.
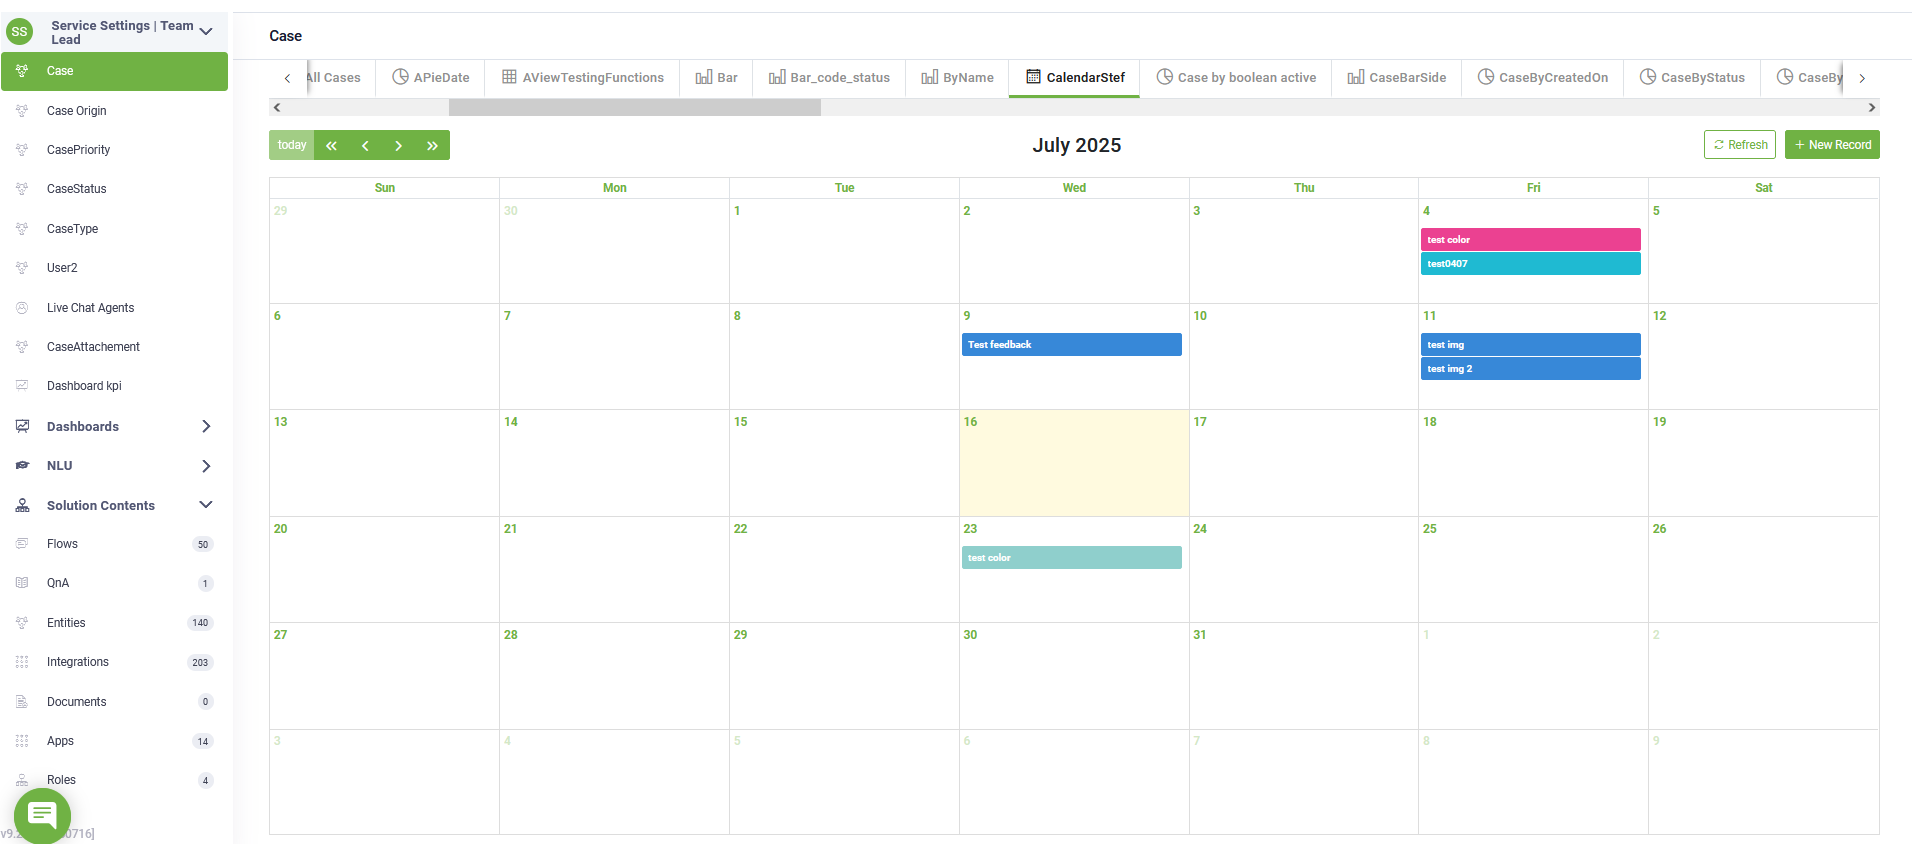
You can use the Calendar views for task tracking, lead tracking, appointments and many other.
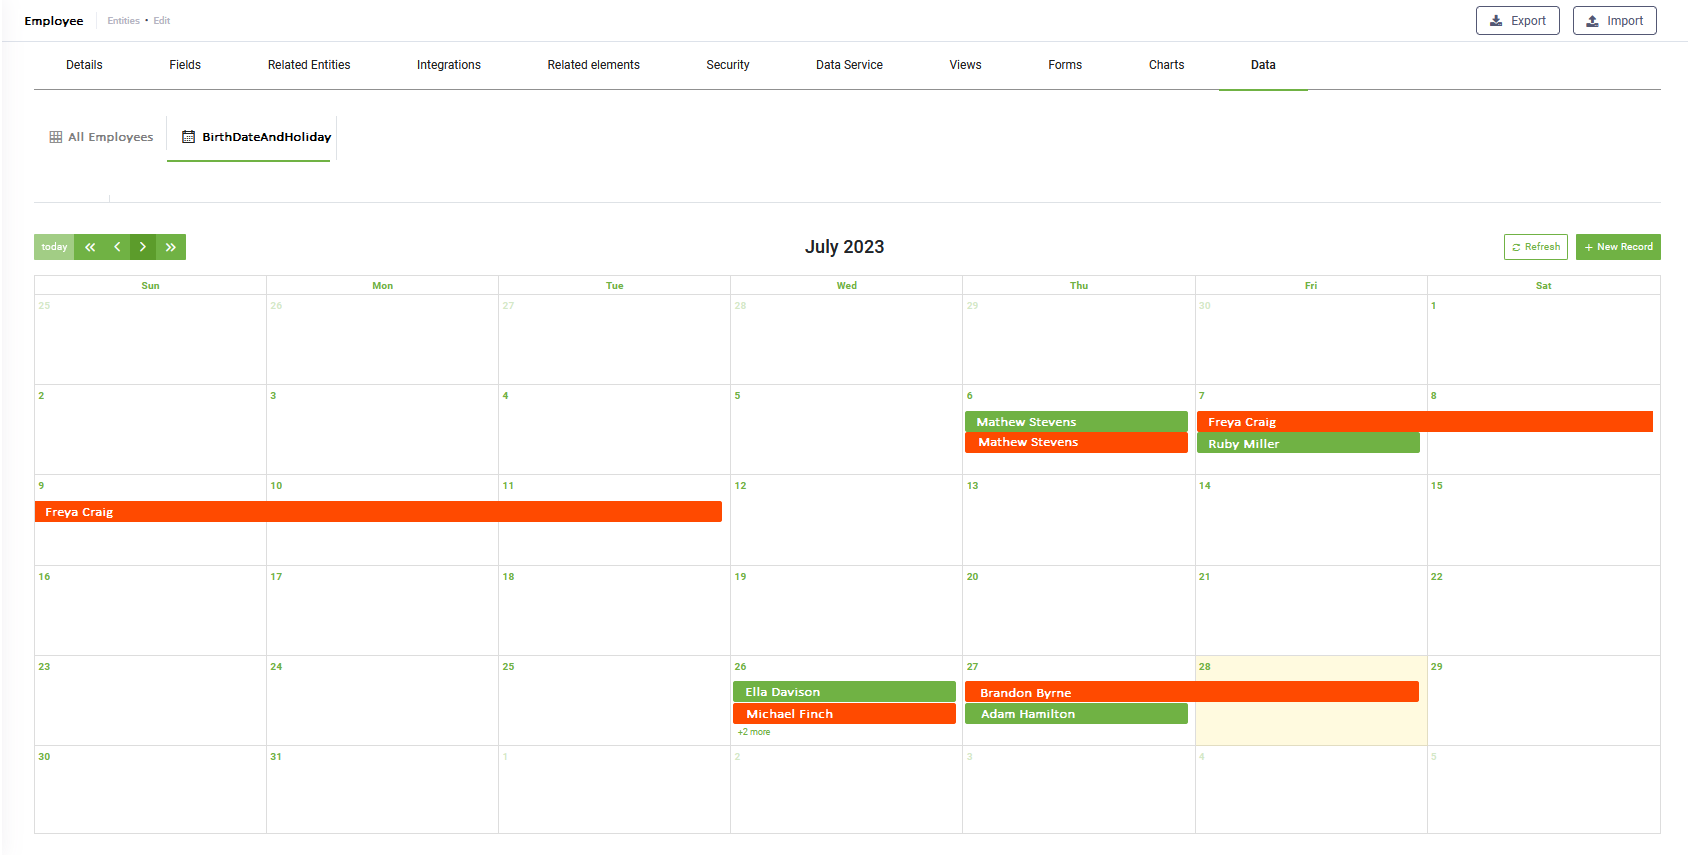
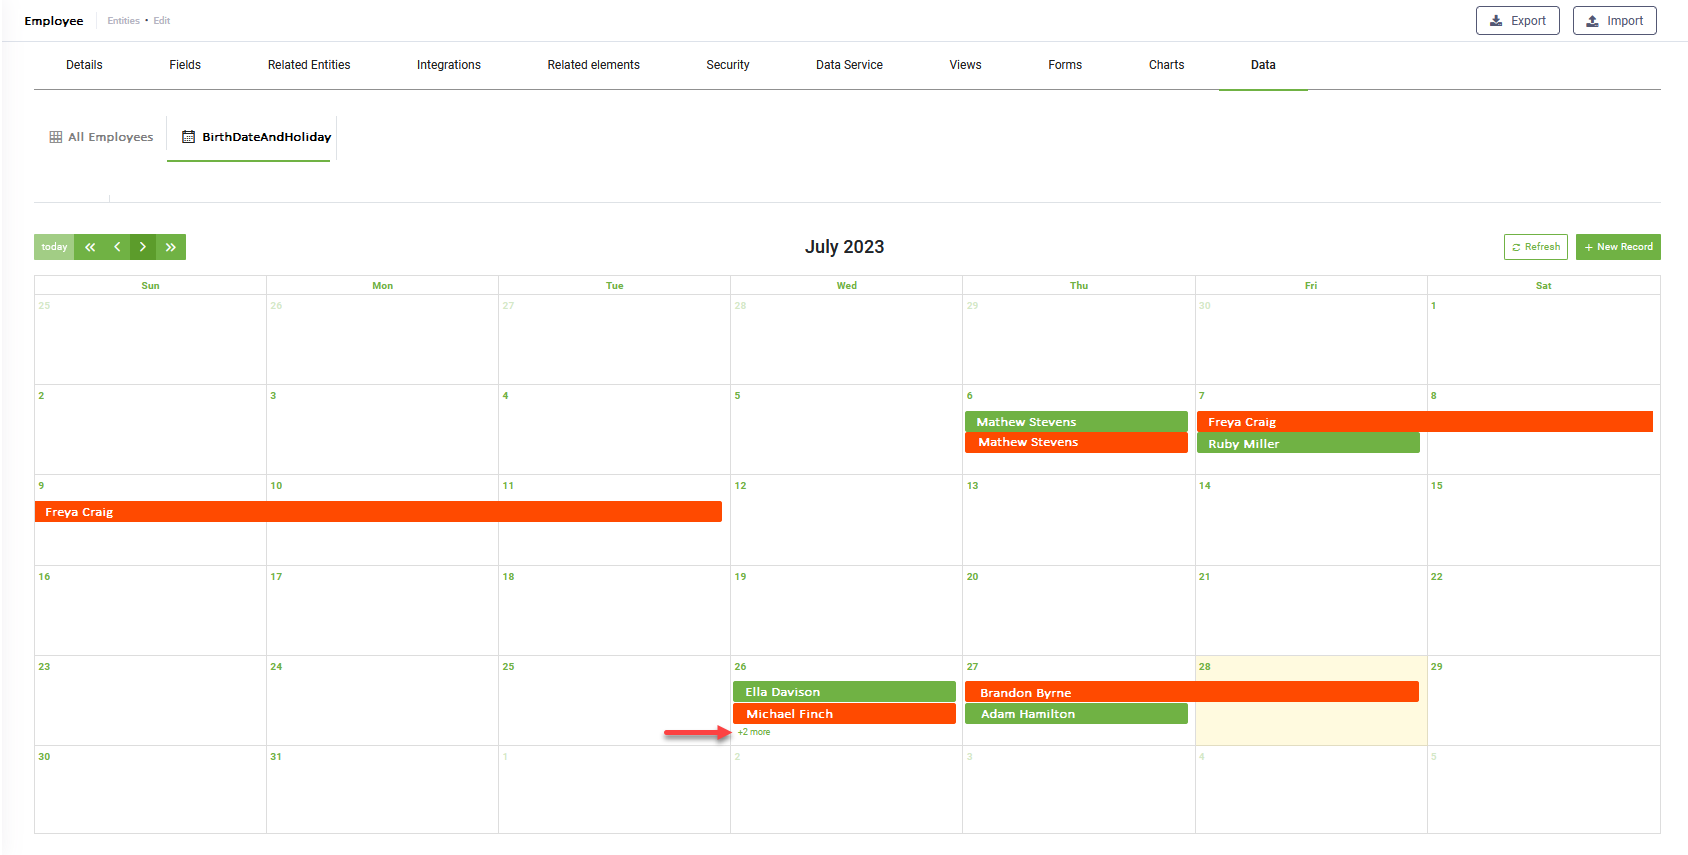
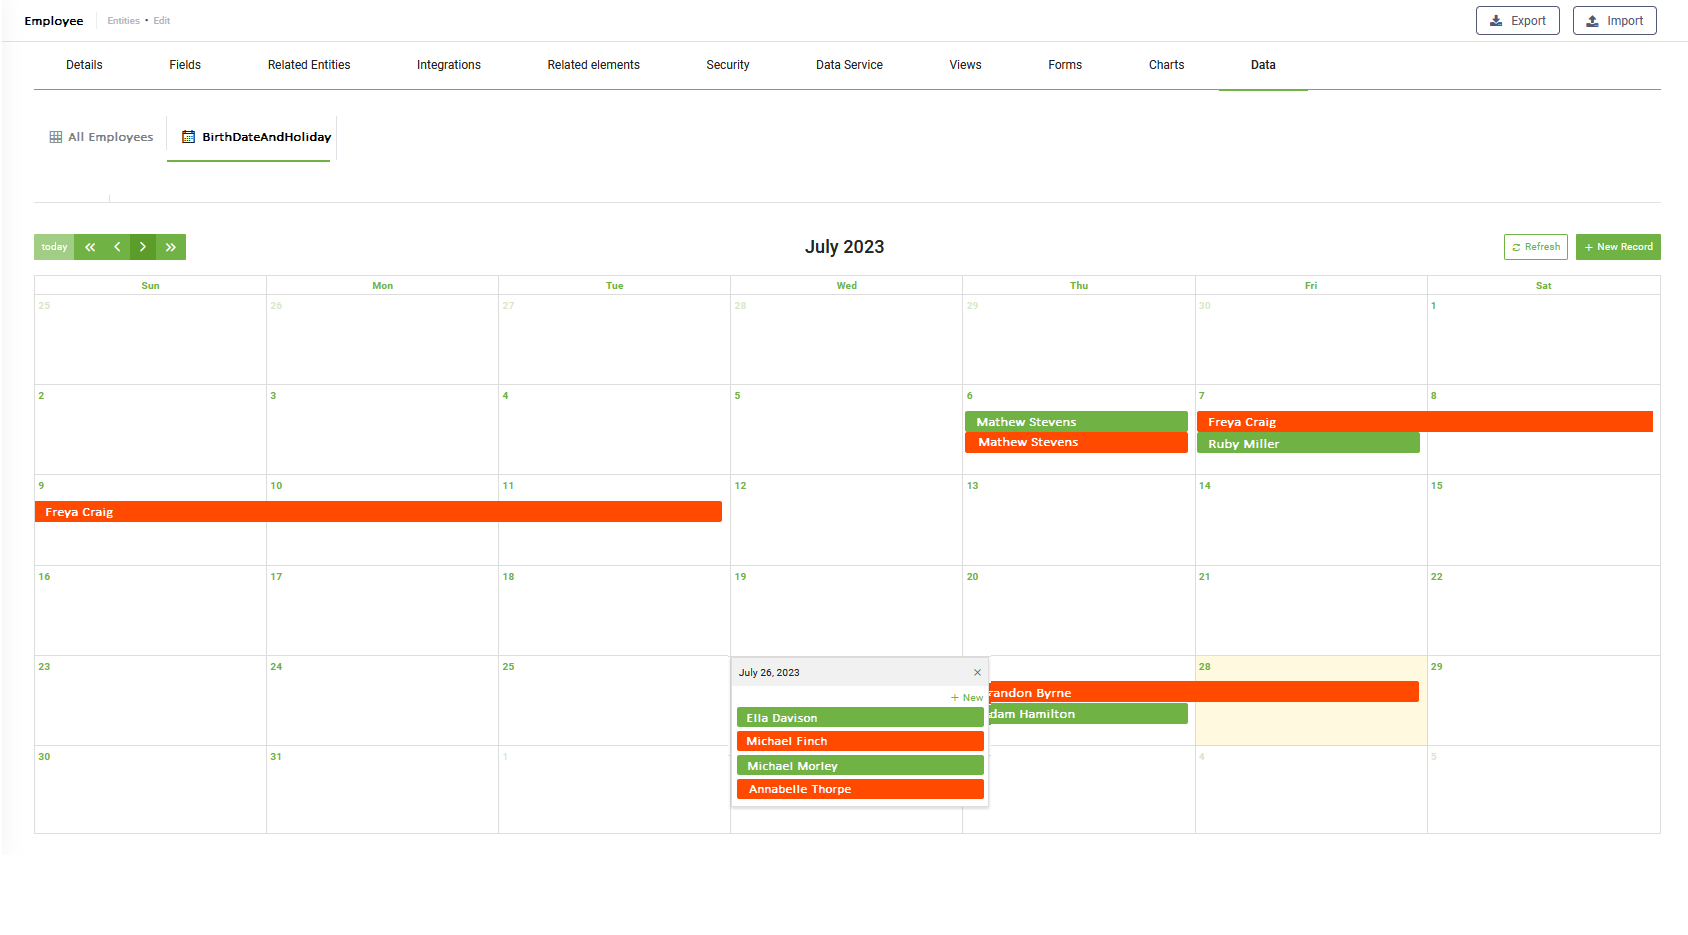
The figure below provides a Calendar view that displays the employees birthday (in green) and their holidays (in red).
To set up a Calendar view follow these two steps:
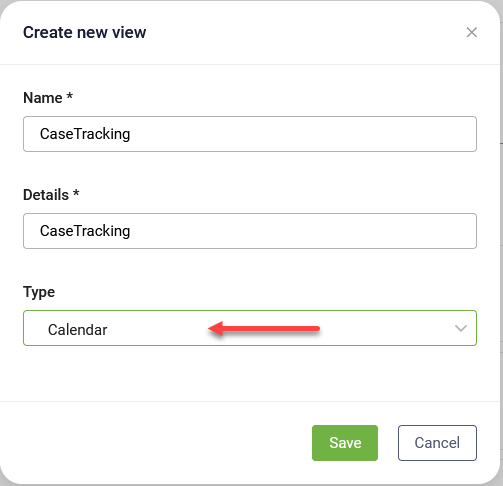
Step 1. Add a Calendar View
Before setting up a Calendar view, you first need to add on the desired entity a view of type Calendar.
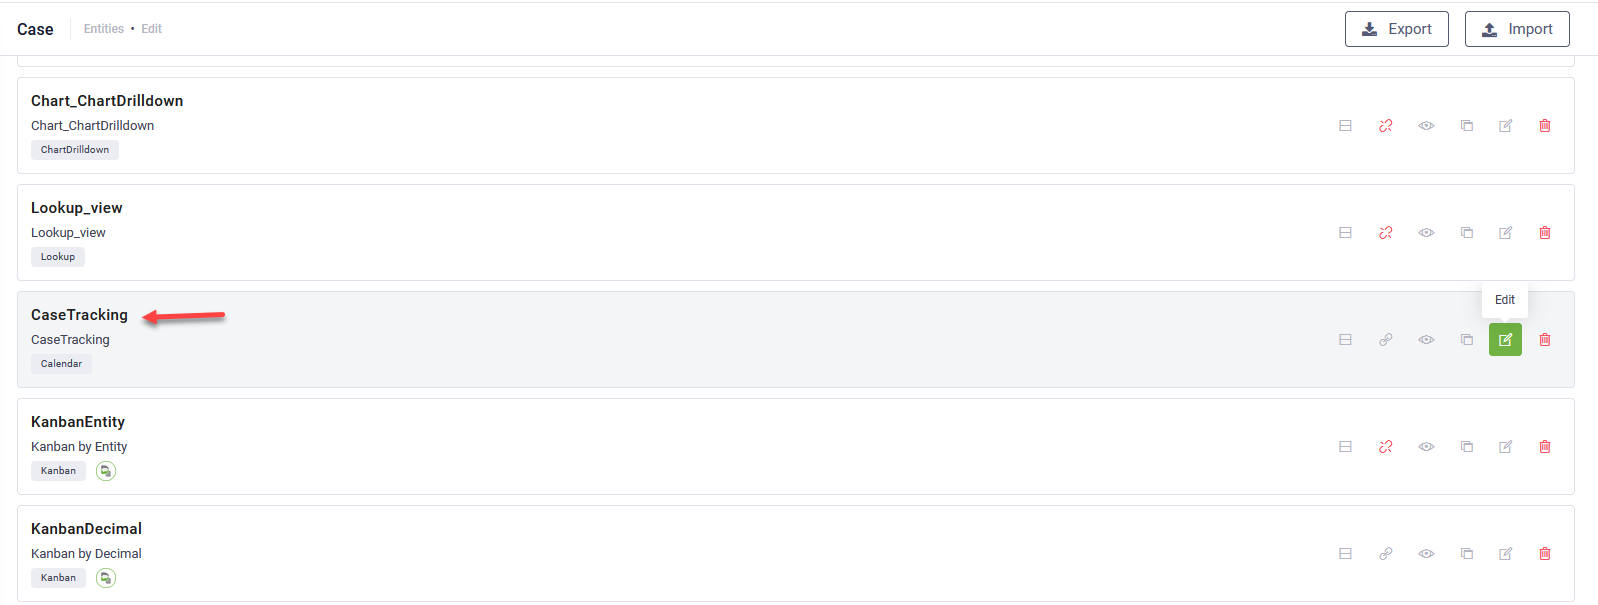
Step 2. Define the calendar view
On the entity’s views page, click on the name of the Calendar view you want to define.
The Calendar view general configuration page appears.
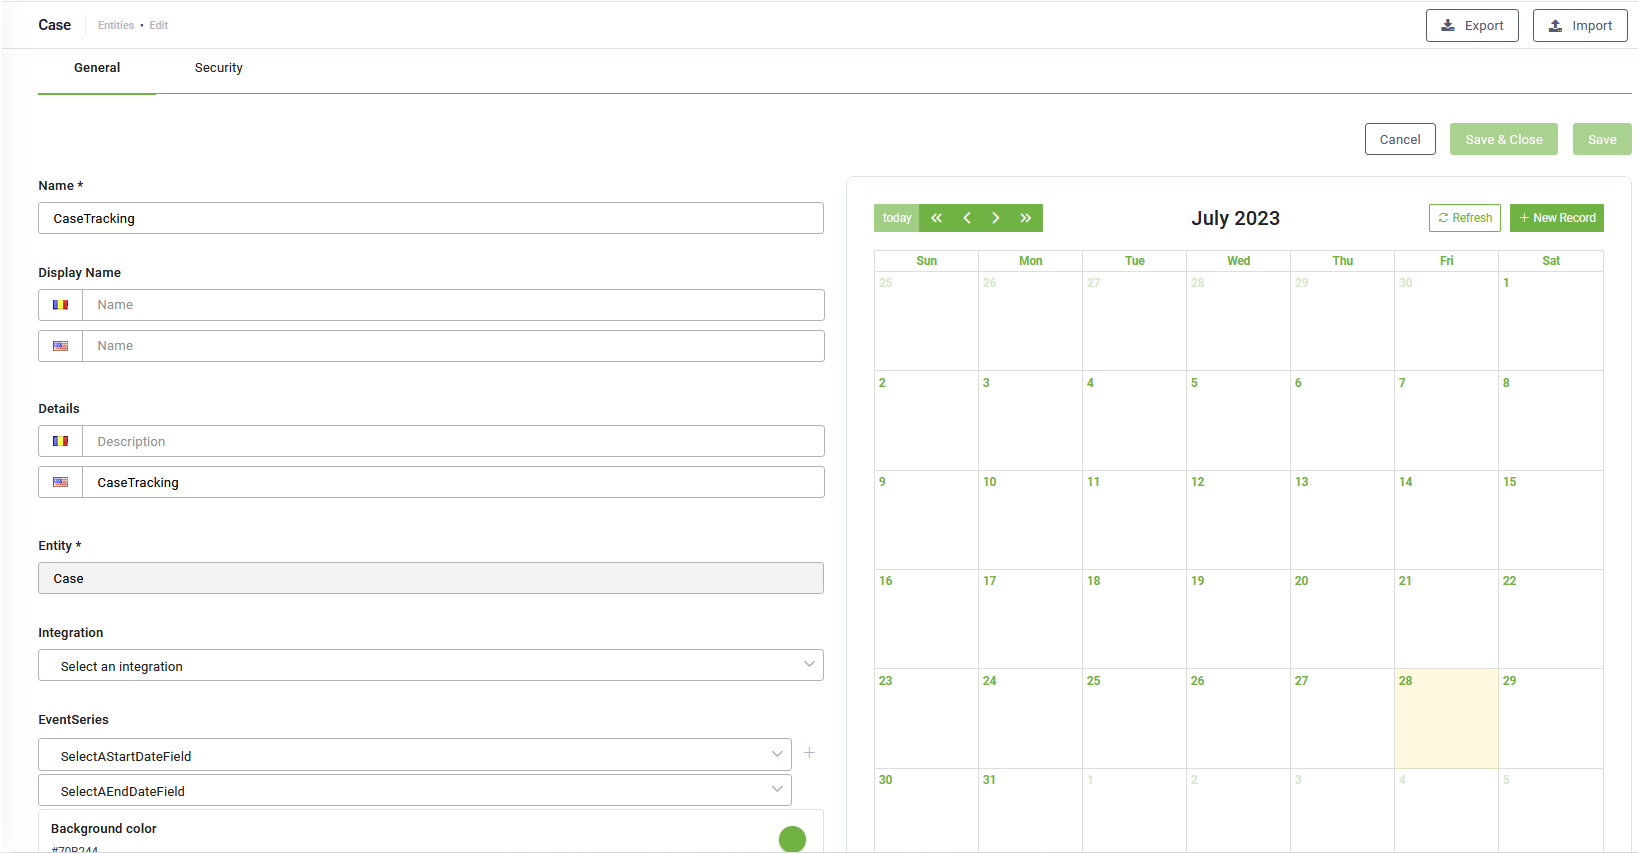
Define the view properties by setting the parameters described in the table below.
| Parameter | Description | Mandatory |
|---|---|---|
| Name | The view name. It displays the name you provided when adding the Calendar view. You can change the view name here. | Yes |
| Display Name | If your view will contain multi-lingual records, you might want to provide the view Display name and Details in all languages set on the AI Agent. This way, business users accessing the Calendar view in a specific language set on the AI Agent will see the information (both the name and description) in that language. | No |
| Details | No | |
| Integration | Select from the list of integrations defined on the entity, a DRUID Data Service query entity integration (as it brings all the entity data). | Yes |
| Event Series |
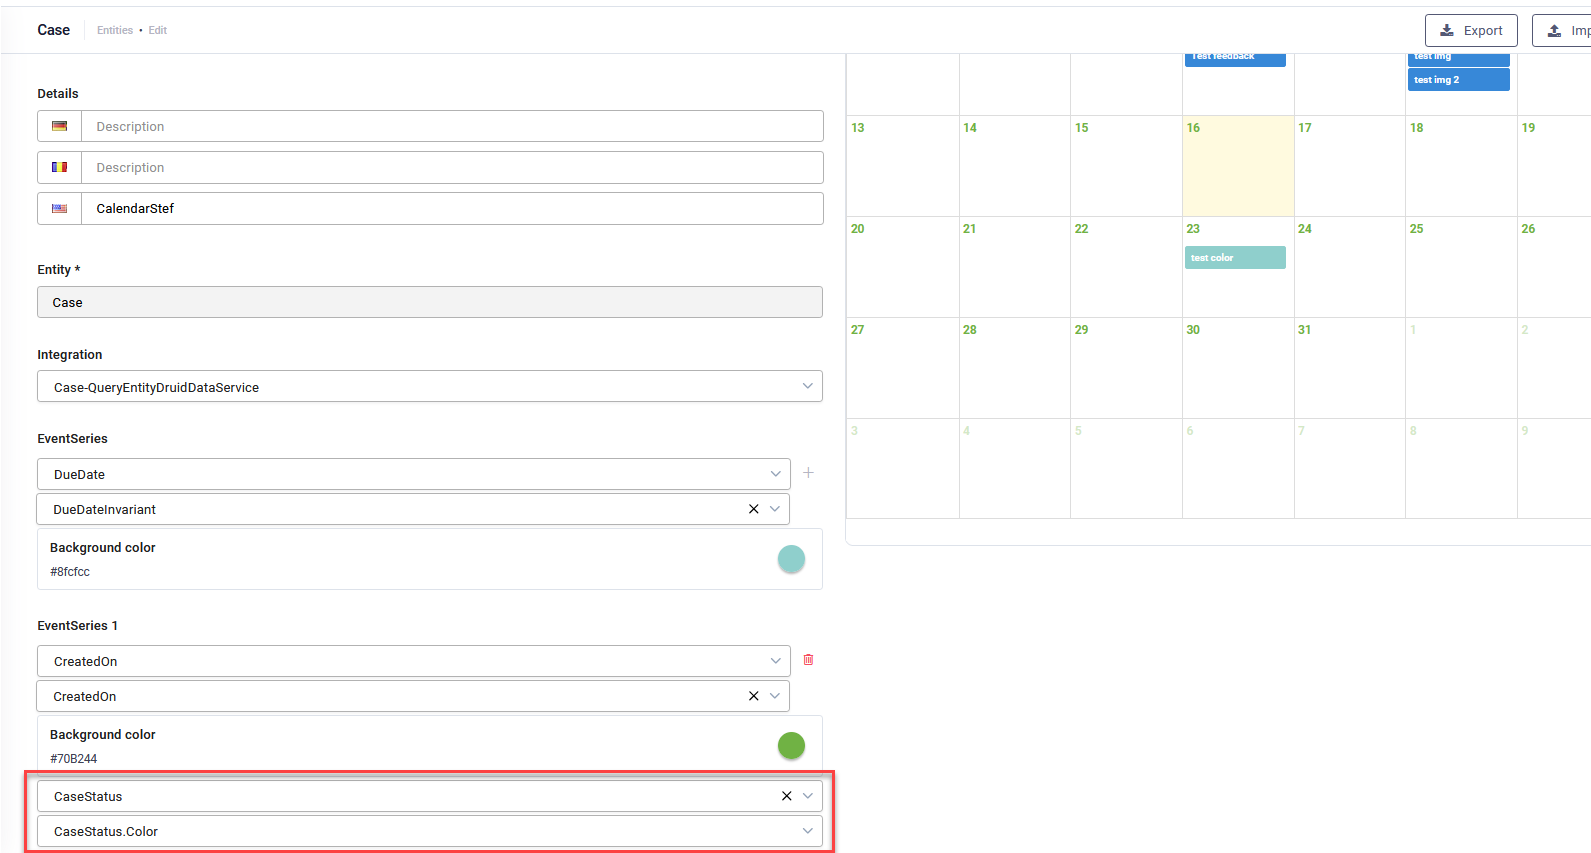
The Event Series area allows you to display in the calendar data records that are one-time events (e.g., employee date of birth, appointment date, case creation), events that spread over multiple days (e.g., tasks, case tracking from creation to closure) or multiple events related to the same records set (e.g., employee's date of birth and holiday). To display records that have one time events, from the SelectAStartDateField drop-down, select the desired Date/DateTime field (e.g., "CreatedOn). To display records that have events spreading over multiple days, from the SelectAStartDateField and SelectAEndDateField drop-downs, select the desired Date/DateTime fields (e.g., "CreatedOn" and "ClosedOn"). To display multiple events (one-time events and/or events spreading over multiple days) related to the same records set, add as many Event Series as events you want to display on the Calendar view by clicking the Add icon next to the first Event Series, then select the Date/DateTime field(s) from the drop-down(s).
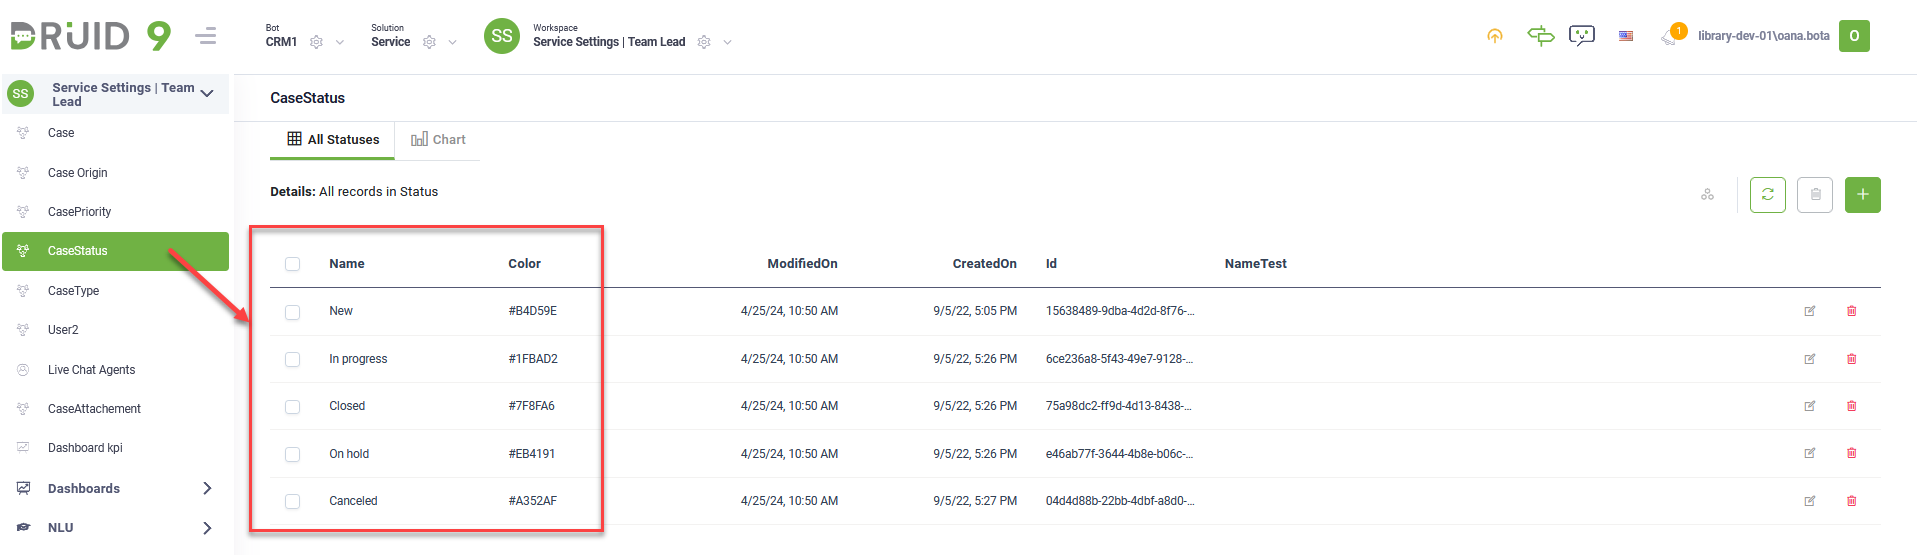
In Druid 9.1 and higher, you can set event series colors based on the colors defined for an entity. For example, assign different colors to case statuses and have cases displayed on the calendar view colored accordingly.
|
Yes |
| Background color |
Select the color for how the entity record event(s) will display on the calendar per Event Series. It helps you differentiate the record events on the calendar view. The default color is Hex #70B244. |
No |

To save the calendar view configuration, click the Save icon ( ) at the top-right corner of the editor.
Manage records in Calendar views
If multiple events occur on the same day (more than two events), the first two events display on the calendar (if they come from different types of Event Series) and the number of how many other events occur that day. To view the full list of events occurring on a specific day, click on the +x more link.
To add a new record, either place the mouse over a particular day and click  or click
  at the top right corner of the view. The form for record configuration appears. Provide the record details, making sure to enter the date field that has been set to be shown on the Calendar view.
To update records on a Calendar view, click on the desired event and in the edit record form make the desired updates.
To delete records on a Calendar view, click on the desired event and in the edit record form, click the Delete icon at the top-right corner of the edit form page and in the confirmation pop-up, click Yes to confirm the deletion.
To move an event to another day, drag and drop it on the calendar view based on your needs.